

“I have never seen elegance go out of style” – SONYA TECLAI
Scala (The Beast) has imported efficiency and elegance to the programming world by combining coziness of object oriented programming with the magic of functional programming. This blog illuminates the work of Ólafur Páll Geirsson who has done a great job of styling the beast. In the bulk below I will discuss my experience of using Scalafmt, its installation process and some of its cool code styling features. Stuff we would be using in this blog
- Editor -> Intellij (v 2017)
- Build Tool -> sbt (v 0.13.15)
- Language -> Scala (v 2.12.1)
One of the most important aspect of good code is its readability which comes with good and standard formatting. Ever wondered how an entire project having around 1000 Scala files of poorly formatted code could be formatted without having a headache? Well going shft + ctrl + alt + l on your IntelliJ could be quite a pain for your fingers and brain.
The goal of Scalafmt is to produce good enough formatted code for Scala so that one can focus on programming instead of manipulating syntax trivia. Who wouldn’t appreciate the following transformation :

To
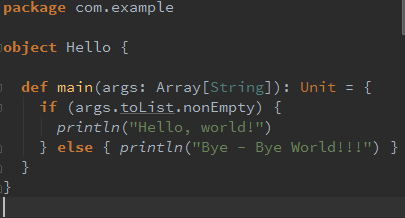
Scalafmt can be used in several environments such as command line, text editors and build tools. In this blog we will look at Salafmt integration with IntelliJ and sbt(My preference).
Adding IntelliJ Plugin
Step 1 “Installation” ->
a). Open File -> Settings -> Plugins
b). Click on Browse repositories and search for scalafmt and install the plugin.
c). Restart IntelliJ
Step 2 “Apply formatting” ->
a). For a single file :
Ctrl + Shift + l
b). For current project :
File -> Settings -> Tools -> Scalafmt -> Check 'Format on file save' -> Apply -> OK
c). For all future projects
File -> Other settings -> Default settings -> Tools -> Scalafmt -> Check 'Format on file save' -> Apply -> OK
NOTE ->
After steps 1 and 2 Scalafmt is integrated in the project and use the default configuration for formatting the code though custom configuration can be easily added to the project in .scalafmt.conf file. We will explore more on defining custom configurations in the next installment of this blog. Following is the order how the IntelliJ plugin picks up the configuration.
- .scalafmt.conf (hidden file) in the project’s root directory, if it exists. It helps in determining the custom formatting for a project.
- $HOME/.scalafmt.conf, if it exists. It helps to determine the custom formatting for all the projects.
- Otherwise, uses default style.
We will now consider how Scalafmt plugin is added in a project via build tool, sbt(Widely used for Scala projects) in our case. And then we will explore how custom formatting configurations can be specified(in .scalafmt.conf).
Adding SBT Plugin
Step 1 “Adding the plugin” ->
Add the plugin mentioned below to plugins.sbt file and refresh the project that you want to integrate with scalafmt. If you cant find the file, make one inside the project folder and add the plugin.
addSbtPlugin("com.geirsson" % "sbt-scalafmt" % "0.6.6")
NOTE ->
Although Scalafmt version 0.6.8 is latest but due to some issues with it as mentioned here , we would be going with Scalafmt version 0.6.6 which is compatible with sbt version 0.13.13 or above; 0.13.15(latest) in our case with scala version 2.12.1. Sbt version may be upgraded by setting the sbt.version field in build.properties file (in project folder) to be 0.13.15 and then doing sbt clean compile to include the latest sbt version. Also make sure you have Java 8 in your system.
Step 2 “Creating .scalafmt.conf file” ->
Due to the presence of the issue mentioned here , we will create an empty .scalafmt.conf file in the root directory of the project for now. .scalafmt.conf is the file in which all the custom formatting configurations go. sbt scalafmt just prints formatted code on stdout if no .scalafmt.conf file is present in the root directory of the project and make no changes in the actual code.
Step 3 “Apply formatting” ->
sbt scalafmt
The above command either picks the custom formatting configuration from ‘.scalafmt.conf’ file (if it exists) in the root directory of the project otherwise formats the project by default formatting. Following command suggest different ways to use scalafmt plugin via sbt :
sbt "scalafmt --help"
Sclafmt comes with the default configurations for the project. We may change the default configuration and provide our customized configuration in .scalafmt.conf file using HOCON syntax. The scalafmt page provides large number of configuration options out of which I would be discussing the 10 most interesting settings(according to me) in the next installment of this blog.
Hope the blog helps you. Comments and suggestions are welcomed.

Reblogged this on Foobar and commented:
Styling your Scala code !
Reblogged this on sandeepknol.
Reblogged this on Arpit Suthar.
Reblogged this on Anurag Srivastava.