

Hi Folks !
In my previous blog, I had talked about Getting Introduced with Presto.
In today’s blog, I shall be talking about setting up(installing) and running presto.
The basic pre-requisites for setting up Presto are:
- Linux or Mac OS X
- Java 8, 64-bit
- Python 2.4+
Installation
- Download the Presto Tarball from here
- Unpack the Tarball
- After unpacking you will see a directory presto-server-0.175 which we will call the installation directory.
Configuring
Inside the installation directory create a directory called etc. This directory will hold the following configurations :
- Node Properties: environmental configuration specific to each node
- JVM Config: command line options for the Java Virtual Machine
- Config Properties: configuration for the Presto server
- Catalog Properties: configuration for Connectors (data sources)
- Log Properties : configuring the log levels
Now we will setup the above properties one by one.
Step 1 : Setting up Node Properties
Create a file called node.properties inside the etc folder. This file will contain the configuration specific to each node. Given below is description of of the properties we need to set in this file
- node.environment: The name of the presto environment. All the nodes in the cluster must have identical environment name.
- node.id: This is the unique identifier for every node.
- node.data-dir: The path of the data directory.
Note : Presto will stores the logs and other data at the location specified in the node.data-dir. It is recommended to create data directory external to the installation directory, this allows easy preservation during the upgrade.
You can put the following default content
node.environment=production
node.id=ffffffff-ffff-ffff-ffff-ffffffffffff
node.data-dir=/var/presto/data
Step 2 : Setting up JVM Config
Create a file named jvm.config inside the etc folder. In the file we will specify all the options we need to configure for the launching of the JVM.
You can put the following default content
-server
-Xmx16G
-XX:+UseG1GC
-XX:G1HeapRegionSize=32M
-XX:+UseGCOverheadLimit
-XX:+ExplicitGCInvokesConcurrent
-XX:+HeapDumpOnOutOfMemoryError
-XX:+ExitOnOutOfMemoryError
NOTE : Please keep in mind that the the format of file must be a single line per option.
Step 3 : Setting up Config Properties
Create a file named config.properties in the etc/folder.This file contains the configuration related to the server. Presto servers can double up as worker and coordinator simultaneously. Before setting up the config file let us discuss the properties in brief :
- coordinator: If set as true it sets the node as coordinator to accept queries from clients and manage query execution. in case of only worker node this value is set to false.
- node-scheduler.include-coordinator : enables scheduling on the coordinator. Can be set to true/false.
- http-server.http.port : specify the port to start the presto server
- query.max-memory : specify the maximum limit for the memory that the query will be allowed.
- query.max-memory-per-node : specify the maximum limit for the memory that the query will be allowed on the single node.
- discovery-server.enabled : can be Set to true/false. It is used to find all nodes in the cluster. On setting false the coordinator will run embedded version of the Discovery service.
- discovery.uri : URI to the Discovery server.
- query.queue-config-file : file configuration to read from in Queue Configurations
Now let us set the properties in the config.properties.
If the node is a coordinator , you can use the following as default content
coordinator=true
node-scheduler.include-coordinator=false
http-server.http.port=8080
query.max-memory=50GB
query.max-memory-per-node=1GB
discovery-server.enabled=true
discovery.uri=http://example.net:8080
If the node is a worker , you can use the following as default content
coordinator=false
http-server.http.port=8080
query.max-memory=50GB
query.max-memory-per-node=1GB
discovery.uri=http://example.net:8080
For a single node doubling up as worker and coordinator, we can use below configuration as default content
coordinator=true
node-scheduler.include-coordinator=true
http-server.http.port=8080
query.max-memory=5GB
query.max-memory-per-node=1GB
discovery-server.enabled=true
discovery.uri=http://example.net:8080
Step 4 : Setting up Log Level
Create a file called log.properties in the etc folder, it is used to set the minimum log level. The only property you need to set in this file is :
com.facebook.presto=INFO
This property can have the following values : DEBUG, INFO, WARN and ERROR
Step 5 : Setting up the Catalog
Presto accesses the data via connectors which are specified by means of catalogs. Catalogs are registered by creating a catalog property file for each connector.
Create a directory called catalog in etc. Inside etc/catalog directory create a catalog. For instance create catalog for jmx.
Create jmx.properties in etc/catalog/ and set the name of the connector like :
connector.name=jmx
Once you have completed the steps 1 to 5, we can begin with running Presto.
Running Presto
Inside the presto installation directory we have a launcher script. Now presto can be run in either the daemon or as foreground process. The main difference between the two is that in the foreground mode, the server is started with logs and output is redirected to stdout/sterr.
to run as daemon use :
bin/launcher start
to run in foreground use :
bin/launcher start
Once you run the above commands , you will be able to see the presto server running on the localhost:8080 (default port) or localhost:<Port>
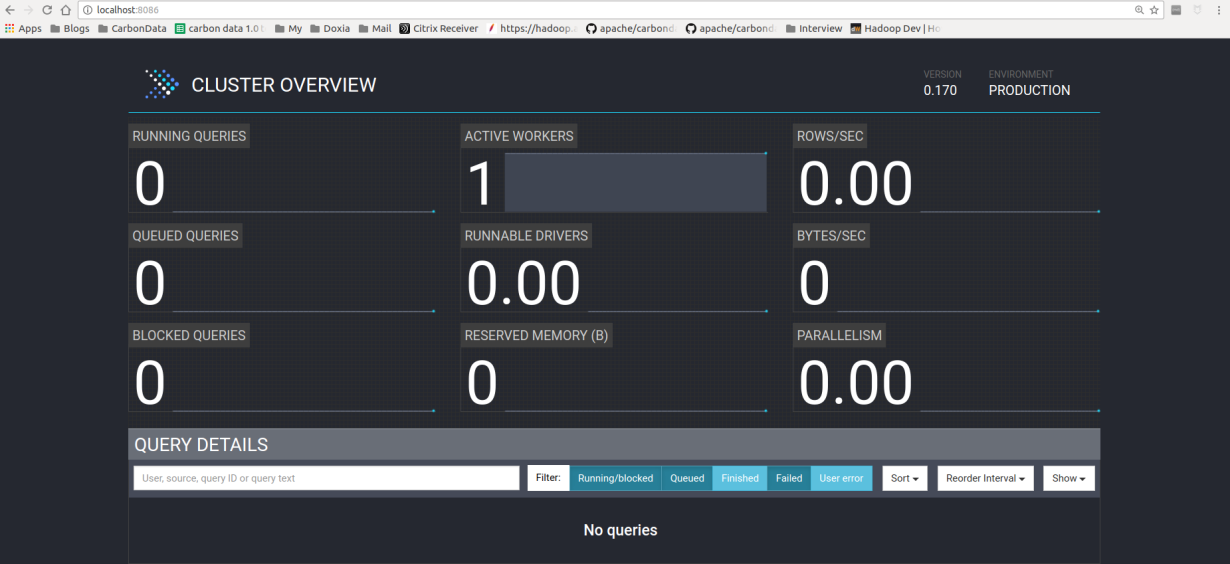
That’s all you need to do to start running Presto !
In my next blog I will discuss how to use presto CLI and set up presto server programatically for applications.
Happy Reading !
References
