

Introduction
Docker images are essential components use for building Docker containers. Although closely related, there are major differences between Docker images and containers.
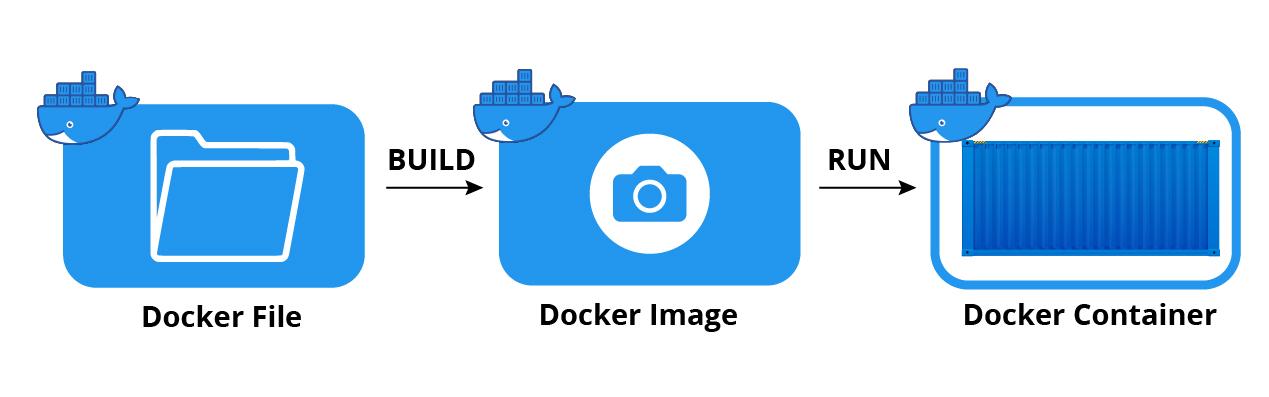
A docker image is the base of a container. These images are created by writing Dockerfiles, lists of instructions automatically executed for creating a specific Docker image.
When building a Docker image, you want to make sure to keep it light. Avoiding large images speeds upbuilding and deploying containers. Therefore, it is crucial to reduce the image size to a minimum. We are going to learn about the change in the size of a docker image.
DOCKER IMAGE
Docker helps to easily create and run container instances with our desired applications. These containers are created using images.
A docker image is a package of code, libraries, configuration files, etc. for an application. The images are to store in repositories (storage locations).
Images can be downloaded from a repository and executed to create docker containers. So, in effect, a container is just a run-time instance of a particular image.
To create a Docker image, a Dockerfile is used. A docker file is a text document, usually saved in YAML format. It contains the list of commands to be executed to create an image.
Best Practices to Reduce Docker Images Size
Here are some basic steps to follow, which will help create smaller and more efficient Docker images.
USE A SMALLER BASE IMAGE
FROM ubuntuThe above command will set your image size to 128MB at the outset. Consider using smaller base images. For each apt-get installer or yum install line you add in your Dockerfile, you will be increasing the image size based on the size of the library. Realize that you probably don’t need many of those libraries that you are installing. Identify the ones you really need and install only those.
For example, by considering an alpine base image, the size of the image will get reduce to 5MB from 128MB.
Compare that to Ubuntu’s size and you can see how making this one change alone is a significant saving. To make it easier, here’s an image size comparison, from Brian Christner:

DON’T INSTALL DEBUG TOOLS LIKE curl/vim/nano
Many developers will use the curl/vim tools inside the Dockerfiles for later debugging purposes inside the container. The image size will further increase because of these debugging tools.
Note: It is that install these tools only in the development Dockerfile and remove it once the development is completed and is ready for deployment to staging or production environments.
MINIMIZE LAYERS
Try to minimize the number of layers to install the packages in the Dockerfile. Otherwise, this may cause each step in the build process to increase the size of the image.
FROM debian
RUN apt-get install -y<packageA>
RUN apt-get install -y<packageB>
Try to install all the packages on a single RUN command to reduce the number of steps in the build process and reduce the size of the image.
FROM debian
RUN apt-get install -y<packageA><packageB>
Note: Using this method, you will need to rebuild the entire image each time you add a new package to install.
USE –no-install-recommends ON apt-get install
Adding — no-install-recommends to apt-get install -y can help dramatically reduce the size by avoiding installing packages that aren’t technically dependencies but are to install alongside packages.
Note: apk add commands should have–no-cache added.
ADD rm -rf /var/lib/apt/lists/* TO SAME LAYER AS apt-get installs
Add rm -rf /var/lib/apt/lists/* at the end of the apt-get -y install to clean up after install packages. (For yum, use yum clean all)
If you are to install wget or curl to download some package, remember to combine them all in one RUN statement. At the end of the run, the statement performs apt-get remove curl or wget, once you no longer need them.
USE fromlatest.io
From Latest will Lint your Dockerfile and check for even more steps you can perform to reduce your image size.
MULTI-STAGE BUILDS IN DOCKER
The multi-stage build divides Dockerfile into multiple stages to pass the required artifact from one stage to another and eventually deliver the final artifact in the last stage. This way, our final image won’t have any unnecessary content except the required artifact.
In short, a multi-stage build is dividing the dockerfile into multiple stages to pass the required artifact from one stage to another and eventually deliver the final artifact in the last stage. This way, our final image won’t have any unnecessary content except our required artifact. Let’s consider an example
# Set up the image generated in the first step and name it builder

FROM node:10-alpine as builder

WORKDIR /nebula-web-console

# Copy the current project to the image

ADD . /nebula-web-console

# Start building

RUN npm install

RUN npm run build
....


# Start the second step build
FROM node:10-alpine

WORKDIR /nebula-web-console

# Copy the product of the first step image to the current image. Only one image layer is used here, which saves the number of image layers in the previous building step.


COPY --from=builder . /nebula-web-console

CMD ["npm", "run", "docker-start"]
Conclusion
Docker containers support the implementation of CI/CD in development. Image size and build efficiency are important factors when overseeing and working with the microservice architecture. This is why you should try to keep your Docker images small, Smaller the image size better the resource utilization, and faster the operations.