

Play is an open source web application framework base on model-view controller architecture. Play is written in java but also provides support for the scala programming language. Here we are going to elaborate the steps about the initial environment setup to start working with scala using play framework.
1. Install scala for play using following command.
2. Create new project as follows (Let us assume that application that is to be created has the name “Test”):
3. Make the project able to import in IntellijIdea. (This is completely your choice. You can use your desired Platform to work with e.g Eclipse etc. )
4. Run the Test application using following command:
5. Check the created application at http://localhost:9000 and verify its working.
Now the created application can’t be directly imported in intellijIdea. Now do it as elaborated follow:
6. Create the new project in IntellijIdea. The location of the project must be the same as the directory where the play project is created.Don’t forget to uncheck the create module option because the created play project itself acts as a module.

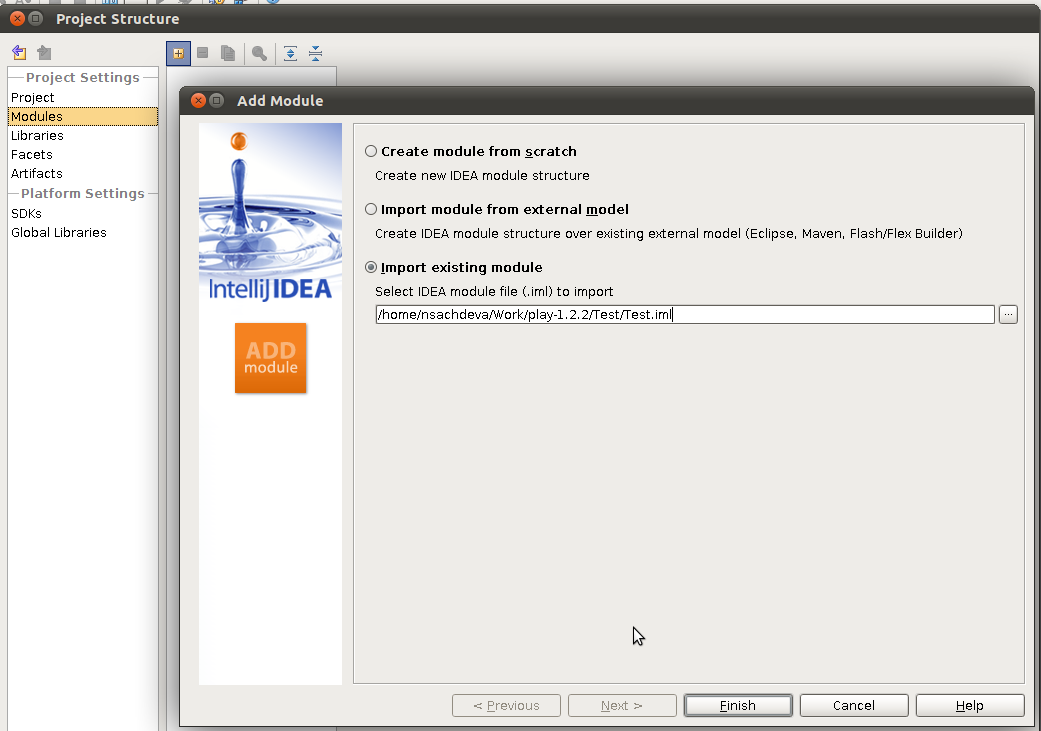
7.Now select ‘Project Structure’ option from the file menu. Click the Module option and press the “+” button. Select the “Import existing module” option and then point towards the (.iml) file.
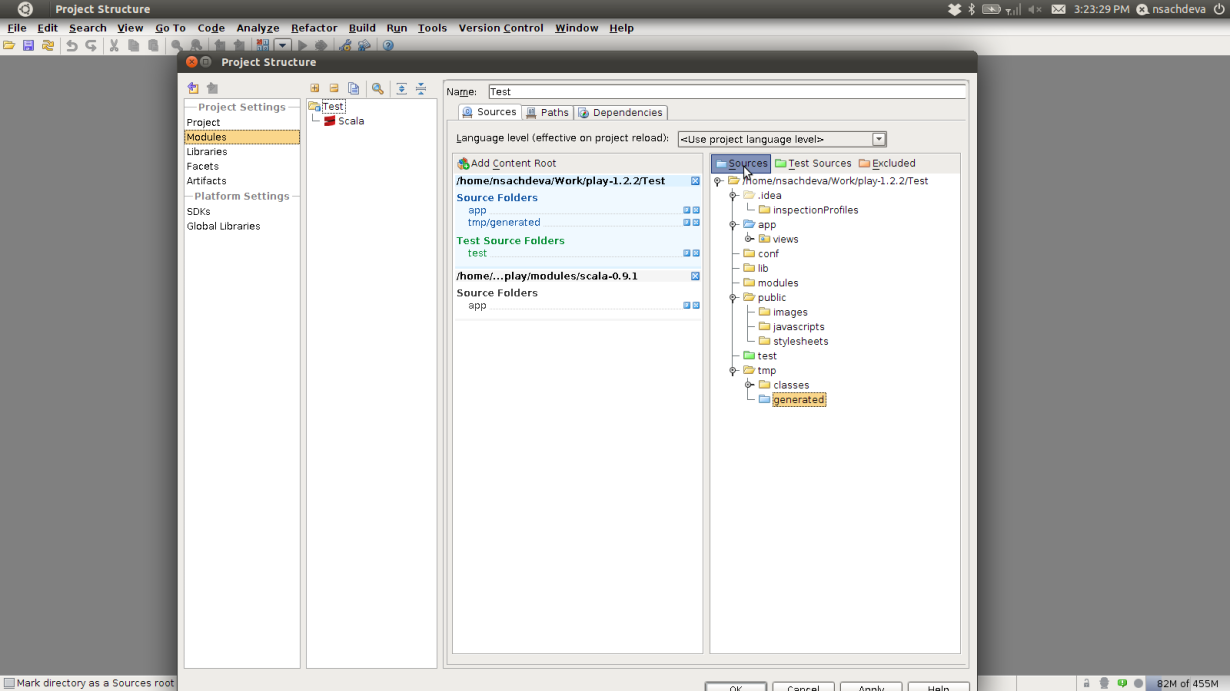
8.Let the Module selected,Then select the ‘tmp/generated’ directory in the right one tree and press the ‘Sources’ button. The HTML template pages are converted to scala source files by Play ,these source files are to be included in the project along with the source files in the Test directory.
9.Select Global Libraries > scala-compiler-2.9.1, Then press the ‘Attach Classes’ button and navigate to the ‘lib’ directory in your Scala 2.9.1 directory. Then select the following files & press Apply.
-scala-compiler.jar
-scala-library.jar

10. Now add another global library as Global Library > scala-library-2.9.1, containing the files scala-dbc.jar, scala-library.jar and scala-swing.jar. Select these files and press OK.
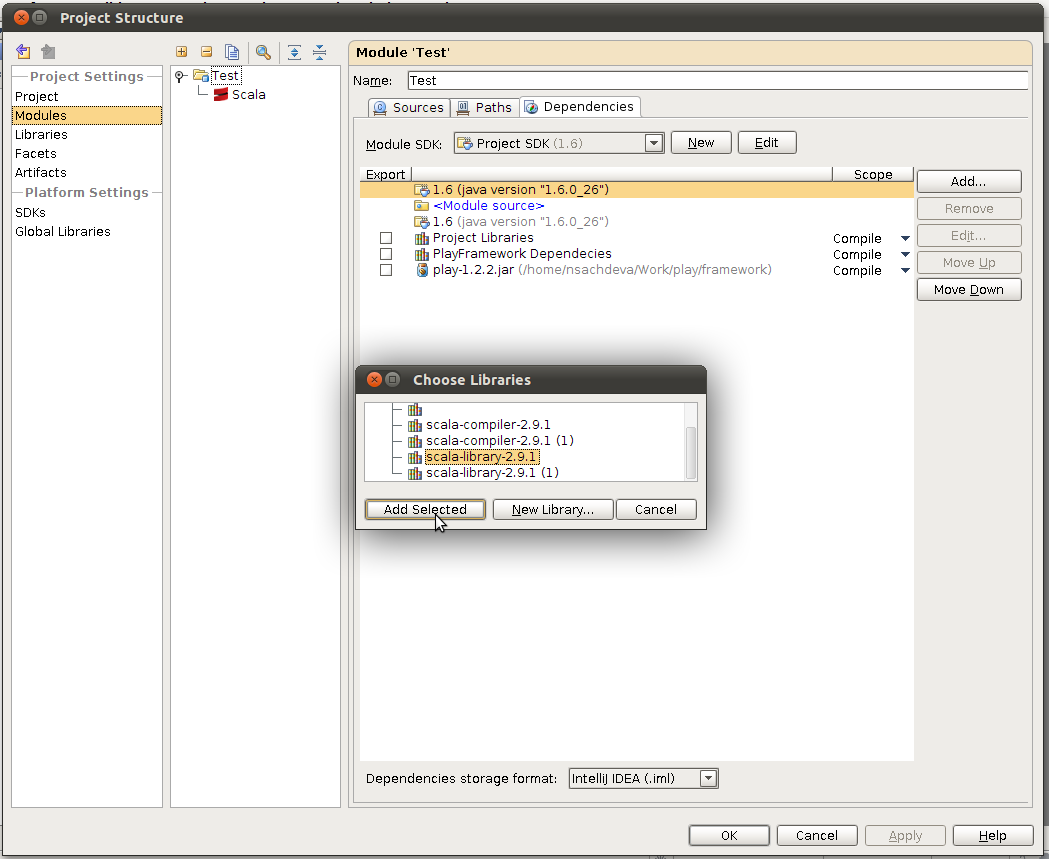
11.Now go to the Modules > Dependencies, press Add button to add new library called “scala-library-2.9.1” to dependencies.
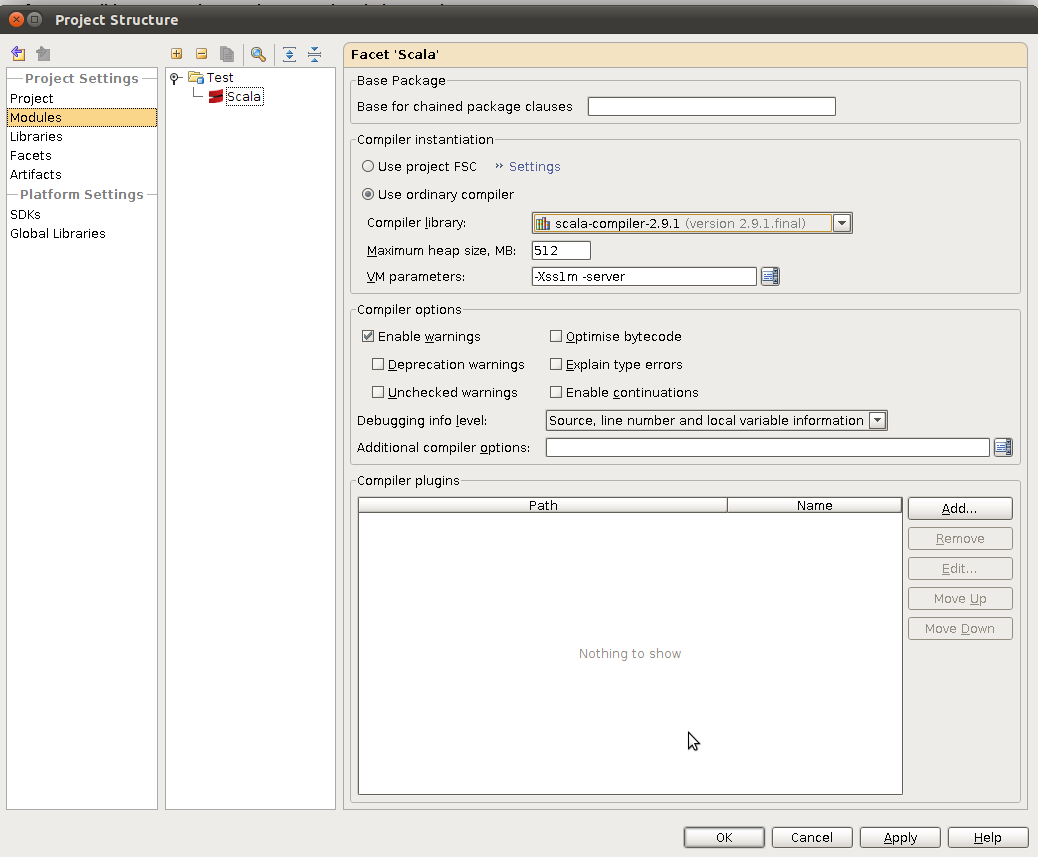
12. Go to Module,select the scala under Test branch and set the compiler library to the presented one on your machine e.g on my machine this is the “scala-compiler-2.9.1”.
13.Save the Project Structure by clicking the “Ok” button.Again verify the project at http://localhost:9000. Your Project development environment is now ready.